Showing posts with label Free Patterns; Original Designs. Show all posts

Sunday 16 April 2023

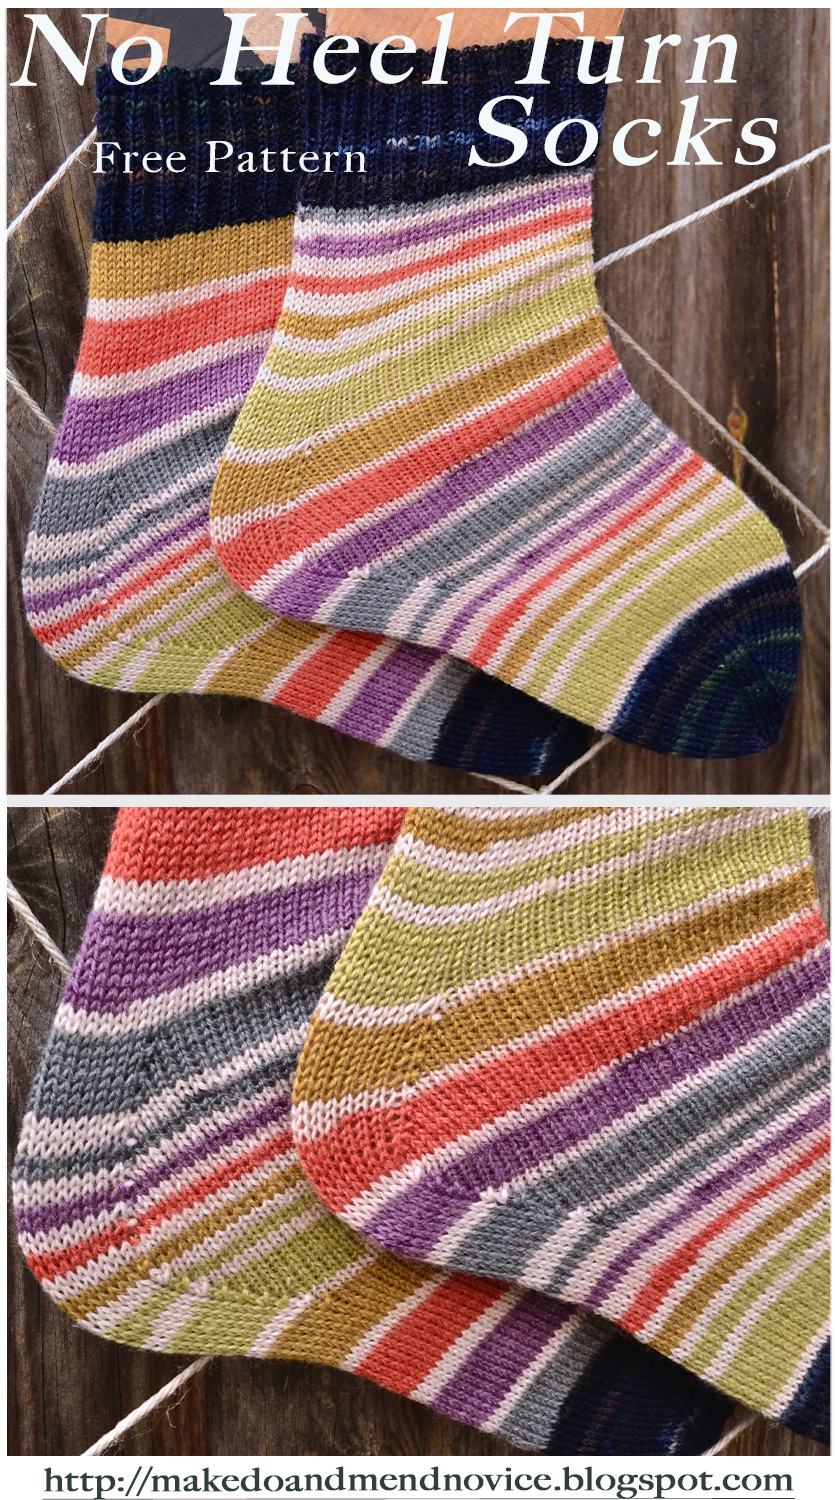
No Heel Turn Sock Knitting Pattern

Heel less socks knitting pattern basic sock knitting pattern free no heel turn socks


If you are looking for a sock knitting pattern that allows you to create seamless, uninterrupted stripes when using self-striping sock yarn, you have come to the right place. 

Meet the No-Heel-Turn-Sock.

Please excuse the makeshift cardboard sock blockers in the images. (I still haven't invested in a pair of blockers...) 

No Heel Turn sock knitting pattern - sock knitting pattern without turning heel

Yes, you heard that right, this sock knitting pattern does not require to work a heel-flap and there is no need to pick up stitches - probably one of the most off-putting aspects for beginner knitters wishing to venture into sock knitting. 

The heel in this pattern is created simply by working increases, followed by an equal number of decreases. 

This sounds incredibly simple and it is, believe me. 

So, if you are able to knit on double-pointed needles in the round, you are confident to work k2tog and ssk decreases, and you have toyed with the idea of getting into sock knitting, this pattern will be a beginner-friendly entry into the wonderful world of top-down vanilla socks. 

Sunday 10 April 2022

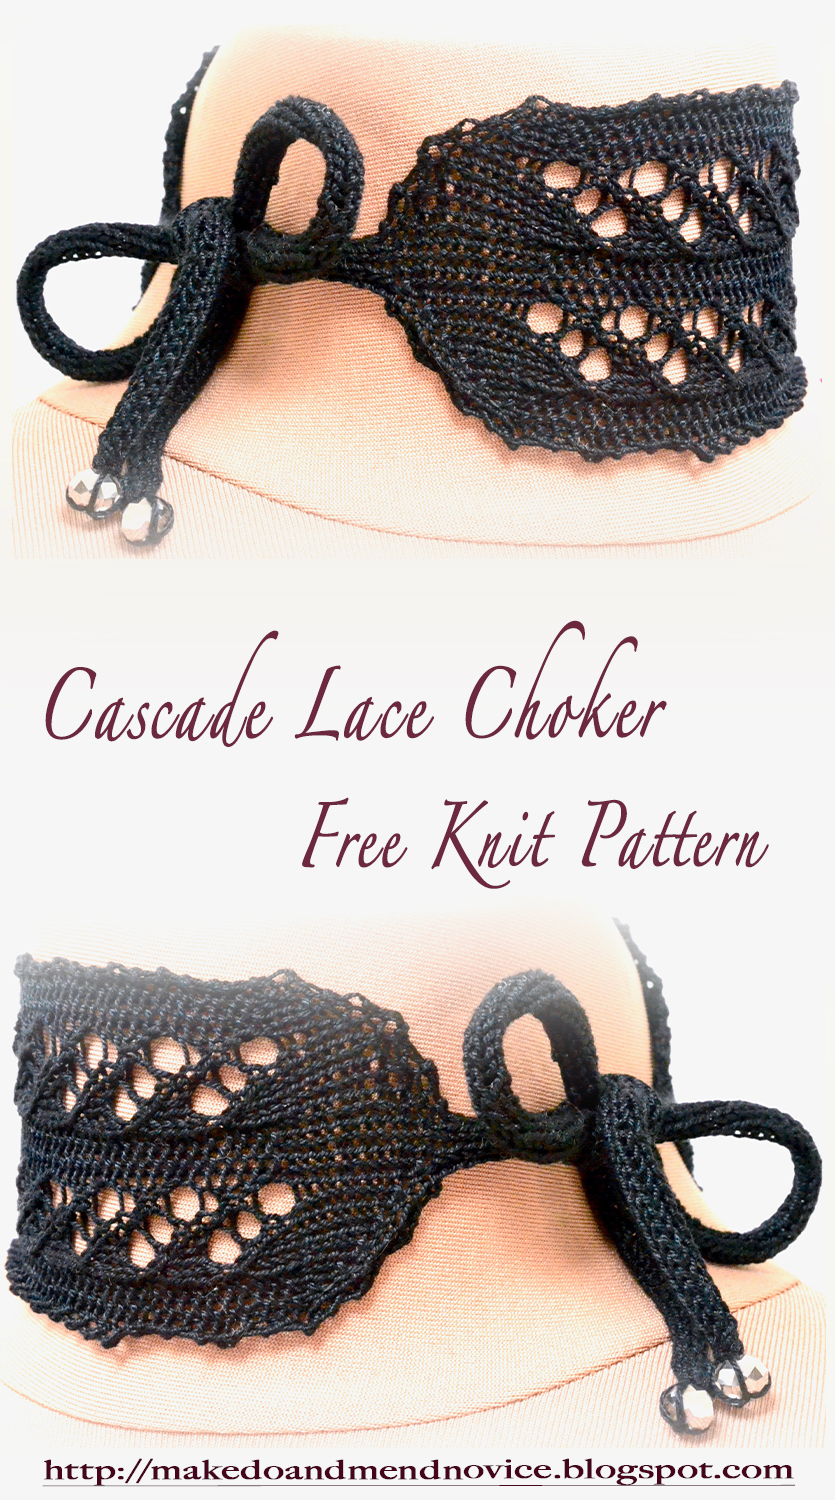
Free Knitting Pattern: Cascade Lace Choker (One-Piece I-Cord Version)

Fee Choker  Knitting Pattern Knit Pattern

- These are the pattern instructions for the one-piece i-cord version of the Cascade Choker. The pattern for the Cascade Choker with attached / grafted i-cords is available here. -  

I recently finished another Cascade Choker and rather than attaching i-cords to the choker after knitting the body of the choker, I decided to knit the i-cords directly at the beginning and at the end of the project to achieve a more organic look. 

This lace choker can be completed in a day or two, including the time it requires to block the finished piece (blocking is absolutely essential to open up the lace). 

The choker requires approximately 5g of Scheepjes Maxi Sugar Rush mercerised cotton yarn and is worked on 2mm - 2.5mm double-pointed needles (dpns). Though it is possible to knit the choker on wood or bamboo needles, I recommend the use of pointy, metallic dpns, especially if you are opting for the use of mercerised cotton yarn with this pattern. This will make the knitting experience much more enjoyable. 

Fee Choker Knit Pattern Knitting Pattern

The length of the choker can be adjusted easily for different neck circumferences and I recommend you check the fit whilst knitting. Altogether, you should ensure that the body of the choker covers around 80% - 85% of the neck. 

The choker is secured with the help of two i-cords, which each measure approximately 20cm in length. These will be tied to a bow. Beads can be attached to the ends of the i-cords for a more sophisticated finish.

The completed piece should be wet-blocked (to open the lace detail) and left to dry over night. 

If you decide to substitute the mercerised cotton with another type of yarn, the number of lace repeats will differ. As you can check the fit whilst knitting, this should not be a major issue, making this project ideally suited to using up all types of yarn leftovers.

Free Choker Knit Pattern


Thursday 19 August 2021

Free Knitting Pattern: Irish Moss Diamond Dishcloth


free diamond motif dishcloth knitting pattern


Free Knitting Pattern: Irish Moss Diamond Dishcloth


I was looking for a small knitting project to use up less than half a skein of Stylecraft Kon-Tiki cotton yarn. On this occasion, I finally decided to pursue the dishcloth option. 

I have never knitted a dishcloth before, thinking that knitted dishcloths are somewhat of a waste of precious yarn, but as this particular skein, which has previously been utilised for many weekly knit swatches, looked already pretty tired and dishevelled from frequent use, the yarn finally needed to be turned into a permanent project. 

free diamond motif dishcloth knitting pattern


Framed by a garter stitch border to keep the fabric flat, the Irish Moss Diamond motifs are worked against a background of stockinette stitch. The diamond stitch motif is created through the variation of knit and purl stitches, making this pattern suitable for knitters of all skill levels.

Sunday 21 February 2021

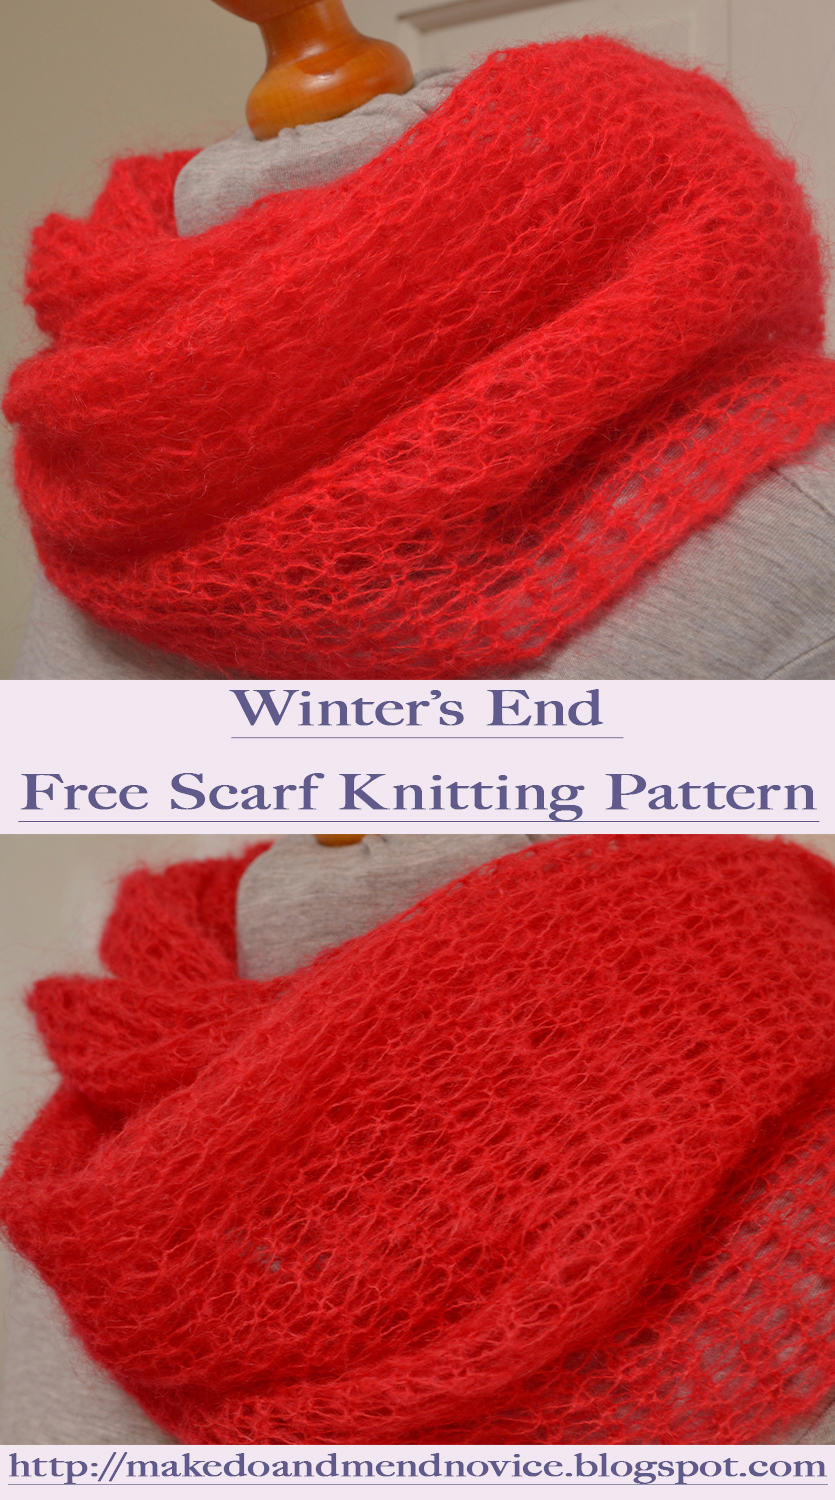
Free Mohair Scarf Knitting Pattern: The Winter's End Scarf

This weekend I completed the final rows of my Winter's End scarf and proceeded to block the scarf right after it came off the needles. The Winter's End scarf is knitted with fine 3 ply lightweight mohair yarn. As the pattern is straightforward and simple, this was my in-between, go-to project for the past four months. 

Free Mohair Scarf Knitting Pattern


Simple Mohair Knitting Pattern with a Technical Twist

The stitch pattern for the scarf is a simple 1x1 rib and to keep things interesting and achieve a unique look, this mohair scarf pattern incorporates a technical twist. In order to achieve the long chain of stitches and airy texture of the scarf, the project is knitted on needles of two different sizes, radically different sizes to be precise: 2mm and 8mm. 


Free Mohair Scarf Knitting Pattern
Free Mohair Scarf Knitting Pattern 

For this reason, and even though the project is perfectly suitable for beginner knitters, the challenge lies not so much in the stitch pattern, but in its execution; i.e. staying in charge of the fuzzy yarn, whilst working the pattern on odd needles and showing them who is boss.


Free Mohair Scarf Knitting Pattern
Free Mohair Scarf Knitting Pattern 


I enjoy working with superfine mohair and really appreciate the unique qualities of this type of yarn, but I am well aware that the fuzziness of the material can be a source of frustration. From my experience with mohair knits, the golden rule for working with this type of yarn is to cast on loosely and to ensure you do not knit tightly. (More information on this, is available here.) This advice holds true for all mohair knits, but is even more important when knitting with mohair on odd needles.  

For the Winter's End Scarf I used Yeoman's 3 ply Elsa ( 30% mohair 40% acrylic 30% nylon), which is a budget option when it comes to Mohair yarn. The pattern is equally suitable for similar yarns or more upmarket choices with a higher mohair component (such as Drops Kid Silk) or, if you are preferring the luxury option, those with an added silk component, i.e. Rowan Kid Silk Haze or Debbie Bliss Angel. 


Free Mohair Scarf Knitting Pattern
Free Mohair Scarf Knitting Pattern 


Gauge is not important for this project and my scarf is designed to be 35 cm wide and 135 cm long, thus producing a generous, versatile piece that can be worn in a variety of ways, either wrapped around the neck several times to keep chills away, as an accessory draped loosely around the shoulders to show off the knitting or as a protective layer for the head, shielding you from the elements, whilst simultaneously covering your entire head without destroying the hairstyle underneath. 

For a narrower scarf, simply cast on fewer stitches, ensuring you cast-on an odd number of stitches. The length of the scarf can be adapted by measuring the scarf as you knit.


Free Mohair Scarf Knitting Pattern
Free Mohair Scarf Knitting Pattern 


Sunday 13 September 2020

Introducing the Virga Shawl


New Knitting Pattern: The Virga Lace Shawl


Despite having completed work on a number of new patterns in recent weeks and months, I have not updated the blog with them. 

This is about to change and I decided to make a start today by posting a few images of my new shawl pattern, the Virga shawl.

Whilst the first test knit of the pattern is now complete, the shawl still requires blocking as well as a minimal amount of finishing; and I need to get to grips with my pattern notes before combining them into a usable pattern.

Sunday 21 June 2020

Monster High: Knee Highs

Free Monster High Knee High Stocking Knitting Pattern


After a pair of Monster High doll leggings and tights, it was high time to knit a pair of knee high stockings for the Monsters Highs.

Monster High Doll Knee High Stocking Knitting Pattern


The knee high stockings are knitted seamlessly from the top-down and finished off at the toes with kitchener stitch.

Monster High Doll Knee High Stocking Knitting Pattern
Monster High Doll - Knee High Stocking Knitting Pattern

Saturday 25 April 2020

Free Knitting Pattern: Brocade Lace Choker

As promised, here is my latest free pattern for a knitted lace choker - a project ideally suited for beginner lace knitters looking for a sense of accomplishment in a quick and easy lace project, which can be completed in a day or two. 


Free Lace Choker Knitting Pattern
Brocade Choker - Free Knitting Pattern
The lace motif, which is knitted over eight rows, is simple, consisting mainly of a combination of standard in- and decreases across fifteen stitches. All wrong side rows are a combination of knit and purl stitches. 

Brocade Lace Choker Knitting Pattern - Lace Detail

For this project I used just 5g of Scheepjes Maxi Sugar Rush mercerised cotton yarn and 2mm double-pointed needles (dpns). Though it is possible to knit this project on wood or bamboo needles, I recommend the use of pointy, metallic dpns, especially if you are opting for the use of mercerised cotton yarn with this pattern. This will make the knitting experience much more enjoyable. 

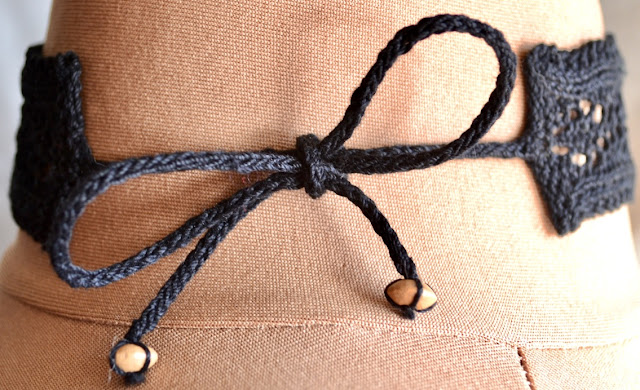
The size of the choker can be adjusted easily for different neck circumferences and I recommend you check the fit whilst knitting. Altogether, you should ensure that the body of the choker covers around 80% of the neck before the piece is blocked. The choker is secured with the help of two dainty i-cords, which each measure approximately 20 cm in length. These will be tied to a bow. Beads can be attached to the ends of the i-cords for a more sophisticated finish. 


Free Lace Choker Knitting Pattern
Brocade Lace Choker - I-Cord Detail

The completed piece should be wet-blocked (to open the lace detail) and left to dry over night.

If you decide to substitute the mercerised cotton with another type of yarn, the number of lace repeats will obviously differ. As you can check the fit whilst knitting, this should not be a major issue, making this project ideally suited to using up all types of yarn leftovers, especially sock yarn.


Free Choker Knitting Pattern
Brocade Choker 

Brocade Lace Choker

Free Knitting Pattern


Measurements


Before starting this project, measure your neck circumference. The lace body of your choker should cover around 80% of your neck and it will be secured with two i-cords, which should be long enough to tie a bow comfortably 


The knitting instructions for the Brocade choker below will produce a piece which measures 26.5 cm (body of the choker after blocking) and the i-cords each measure 20 cm in length. For a choker measuring 26.5 cm, you will work 16 repeats of the lace sequence for the body of the choker. One repeat measures approximately 2 cm. Adjust the number of lace repeats for a shorter or longer choker.


Free Choker Knitting Pattern
Brocade Choker Knitting Pattern

Materials and Tools


  • 5g of Scheepjes Maxi Sugar Rush mercerised cotton yarn 
  • 2 mm double-pointed needles
  • 1.5 mm crochet hook / fine darning needle (for sewing-in yarn ends and attaching bead)
  • contrast yarn (for provisional cast-on)
  • 2 beads for securing the ends of the i-cords (optional)
  • Blocking utensils


Free Choker Knitting Pattern
Brocade Choker Knitting Pattern 


Instructions

  • Cast-on 15 stitches, using the provisional cast-on for the three centre stitches (7,8,9) as shown in the photo below. The three live stitches are located, where the i-cord will be worked later.
Provisional Cast-On Choker
Provisional cast-on for i-cord
  • Knit 4 rows (garter stitch)
Start of lace pattern:
  • Row 1 (right side): k2, p2, k2tog, [k1, yo] twice, k1, sl1, k1 psso, p2, k2
  • Row 2 (wrong side): k4, p7, k4
  • Row 3: k2, p2, k2tog, yo, k3, yo, sl1, k1, psso, p2, k2
  • Row 4: k4, p7, k4
  • Row 5: k2, p2, k1, yo, sl1, k1, psso, k1, k2tog, yo, k1, p2, k2
  • Row 6: k4, p7, k4
  • Row 7: k2, p2, k2, yo, sl1, k2tog, psso, yo, k2, p2, k2
  • Row 8: k4, p7, k4
  • For a choker body measuring 26.5 cm repeat the above lace sequence 16 times. Adjust the number of repeats according to your own requirements.
  • Knit 3 rows in garter stitch, ensuring that the cast-off is started on the wrong side.
  • Bind off all stitches up to the three centre stitches, knit the centre three stitches (7, 8, 9) and cast-off the remaining stitches. 

I-cords: 
  • Start knitting a 20 cm i-cord with the three remaining live stitches, bind-off i-cord  and attach bead (optional). 
  • Pick-up the three centre stitches from the provisional cast-on edge, attach yarn and proceed to knit the  second i-cord. Ensure the i-cords are long enough to comfortably tie a bow.

Icord  Detail  - Knitted Lace Choker - Free Knitting Pattern
Brocade Choker - I-Cord Detail


Finishing:
  • Weave-in all yarn ends and block piece to ensure the lace is opened up.  


Should you require pattern support, please feel free to contact me via Ravelry, Twitter, Facebook, by e-mail or leave a comment below.

This pattern is for personal use only and may not be reproduced for commercial purposes without permission. Neither may you sell any items made from the directions in this pattern.

Should you wish to knit another choker (and, let's face it, one can never have enough chokers), the pattern for my Nameless Choker (pictured below) is available here and the pattern for the Cascade Choker (last image in this post) is available here.

Nameless Choker
Lace Choker Knitting
Cascade Lace Choker


© 2020 Clarice Asquith. All rights reserved. http://makedoandmendnovice.blogspot.com


Tuesday 7 January 2020

Free Knitting Pattern - Monster High Doll Tights


Monster High Doll Tights Knitting Pattern


Having recently released a Monster High doll leggings pattern, I wanted to develop this project further and adapt the leggings pattern into Monster High doll tights. The result of my experiment is this pattern.

The tights are knitted seamlessly from the top-down and finished off at the toes with kitchener stitch.

For the tights in the images I used Madelinetosh Tosh Merino Light sock yarn in Victorian Gothic, but the pattern should work with any 4 ply sock yarn. 

To achieve snug-fitting tights, I recommend checking the fit on the doll frequently to see whether it's necessary to insert additional knit rows between the calf-decreases.  


Free Monster High Tights Pattern
Monster High Tights Knitting Pattern


Monster High Doll Tights

Pattern Notes


Materials and Tools

  • app 10 - 15g of 4 ply Sock Yarn 
  • 2 - 3mm Double-Pointed Needles 
  • 4 Stitch Markers
  • Scissors
  • Safety Pin (x 2) or Scrap Yarn (in contrasting colour)
  • Darning Needle (for kitchener stitch), Crochet Hook (for sewing in ends and tidying up)

Monster High Doll Tights  Pattern
Monster High Tights Knitting Pattern


Cast on 24 stitches.

Row 1: k1, p1 to end of row.

Row 2 - 4: Divide stitches evenly on 3 double-pointed needles and join in the round, placing a stitch marker at the beginning of the round. Continue in k1, p1 ribbing for another 3 rounds.

Waist Increases: 

Row 5: SM (slip marker), k1, PM (place marker), kfb, k8, kfb, pm, k1, pm, kfb, k10 to last stitch, kfb (28 stitches)

Row 6 - 8: Repeat above increase row three times until stitch count totals 40 stitches.

Continue knitting 5 - 8 rounds in stockinette stitch until the piece has reached the desired length and fits comfortably around the dolls hips. 

Dividing for the legs

Removing markers, at the beginning of the next round place the first 20 stitches onto waste yarn. 

Join the remainder of the stitches in the round, placing a marker at the beginning of the round.

Row 11: sm (slip marker), kfb, knit to last stitch, kfb (22 stitches)

Row 12: k all stitches

Thigh Decreases

Row 13: sl1, k1, psso, k to last 2 stitches, k2tog (20 stitches)

Row 14: k all stitches

Row 15: sl1, k1, psso, k to last 2 stitches, k2tog (18 stitches)

Row 16: k all stitches

Row 17: sl1, k1, psso, k to last 2 stitches, k2tog (16 stitches)

Row 18: k all stitches

Row 19: sl1, k1, psso, k to last 2 stitches, k2tog (14 stitches)

Row 20 - Row 57: continue knitting in stockinette stitch for 38 rows (knitting throughout) until the piece has reached the dolls calf.


Monster High Tights Pattern
Monster High Tights Knitting Pattern


Calf Decreases 


During this section, it's advisable to keep checking the fit on the doll. If you notice that you require more rows for added length, insert these between the decrease rows after checking the fit.

Row 58: k to last 4 sts before end of round, sl1, k1, psso, k2tog (12 stitches)

Row 59 - Row 63: k 4 rows in stockinette stitch 

Row 64: k to last 4 sts before end of round, sl1, k1, psso, k2tog (10 stitches)

Row 65 - Row 68: knit 4 rows in stockinette stitch 

Row 69: k to last 4 sts before end of round, sl1, k1, psso, k2tog (8 stitches)

Row 70 - Row 73: knit 4 rows in stockinette stitch 

Row 74: k to last 4 sts before end of round, sl1, k1, psso, k2tog (6 stitches)

Row 75 to bind off: continue knitting in stockinette stitch until the knitted fabric almost entirely engulfs the doll's foot as shown in the picture below.

When the doll's foot is comfortably covered by the knitted fabric, switch to two double-pointed knitting needles and align them parallel to one another, preparing to bind the last remaining stitches off in kitchener stitch.   


Ready for kitchener stitch bind off 

More in-progress photos of the tights are available here. You may find them helpful to show the bind-off.

When the bind off is complete, insert the needle at the corner of the toes and pull the yarn through to the inside to achieve a bump-free finish. 

The Second Leg 

Proceed to knit the second leg, dividing stitches held on scrap yarn evenly on three double-pointed needles. Using the m1 increase method, pick up 1 stitch at the beginning and at the end of the round to ensure a closed up seam. 

Mark the beginning of the round and start knitting the second leg, following the instructions above. Ensure that the thigh decreases are positioned at the inside of the leg and the calf decreases are positioned at the back of the doll's leg.

When the tights are complete, block the finished object by leaving it fitted on the doll. This will ensure that the fabric is nicely stretched into shape.  

Free Monster High Tights  Pattern
Monster High Tights Knitting Pattern


Free Monster High Doll Tights Pattern
Monster High Tights Knitting Pattern

Should you require pattern support, please feel free to contact me via Ravelry, Twitter, by e-mail or leave a comment below.

This pattern is for personal use only and may not be reproduced for commercial purposes without permission. Neither may you sell any items made from the directions in this pattern.


© 2020 Clarice Asquith. All rights reserved. http://makedoandmendnovice.blogspot.com

Friday 27 December 2019

Big Jim Action Figures - Free Pants Knitting Pattern

Boxer Shorts for Big Jim Action Figures


Having crafted a lot for my collection of Monster High fashion dolls lately (more here), I decided it was time to branch out and design some pants / boxer shorts for Winnetou, a Big Jim Action figure and by far the oldest doll in my collection.

Big Jim Action Figure (Winnetou / Geronimo) by Mattel ca 1970s / 1980s


With boys being the obvious target market, Big Jim action figures were produced by Mattel during the 1970s up to the mid-1980s, when production of the line eventually seized. As you can see from the picture above, the dolls don't have a proper head, yet come with a variety of other features, including a bulging biceps and the legendary push button in their backs, enabling the characters to execute what is supposed to resemble 'a karate chop move'. For a demonstration, watch the video below.


Though I don't have any concrete proof, I assume that my figure is named Winnetou, the Native American chief, originally marketed as part of the German 'Karl May' movie edition of the toys. These were distributed in other countries as part of the regular Big Jim / Kid Acero line with a  generic wild west theme and Winnetou being renamed Geronimo. 

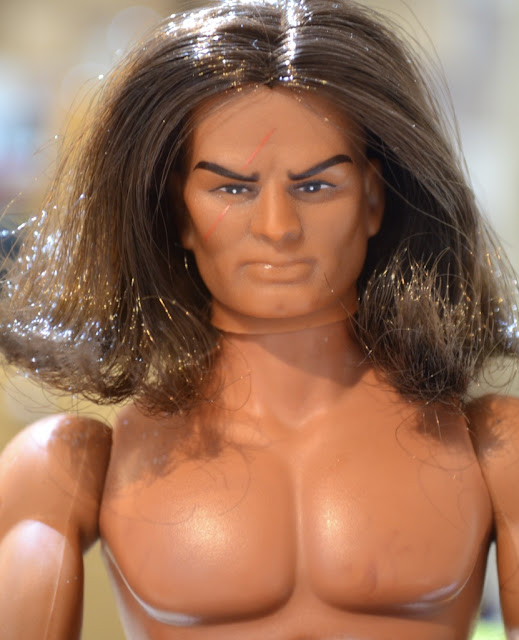
Unlike most of the other Big Jim figures, Winnetou was one of the few characters, who sported a head full of hair, which, given the age of the toy, is still in perfect condition.

At any rate, having recently designed a basic leggings pattern for the Monster Highs, I adapted the pattern for Big Jim action figures and knitted Winnetou (and friends) a few pairs of boxer shorts. Winnetou seems pleased and my boxer short pattern can be found below.


Big Jim Action Figure (Mattel)
Big Jim Action figure (by Mattel) in hand knitted boxer shorts (by me)
Big Jim Action figure Winnetou (by Mattel) wearing handknitted boxer shorts
Big Jim Action figure (by Mattel) in hand knitted boxer shorts (by me) 


Free Big Jim Action Figure Boxer Shorts Knitting Pattern


Knitted seamlessly from the waist down, this pattern gives you the chance to check whilst knitting to ensure a snug fit; and the length of the boxer shorts  can obviously be adjusted as you go. 


Big Jim Action figure Winnetou (by Mattel) wearing handknitted boxer shorts

Big Jim Action figure Winnetou (by Mattel) wearing handknitted boxer shorts

Knitted on 2.5mm to 3mm needles, the pattern is suitable for all types of sock yarn. For  the  boxer shorts in the images, I used Madelinetosh Tosh Merino Light (Victorian Gothic - for the dark purple pants) and Araucania Botany Lace for the pink and multi-coloured versions.


Materials and Tools

  • app 5 - 10g of: 4 ply Sock Yarn 
  • 2 - 3mm Double-Pointed Needles 
  • 4 Stitch Markers
  • Scissors
  • Safety Pin x2 or Scrap Yarn (in contrasting colour)
  • Darning Needle, Sewing Needle or Crochet Hook (for sewing in ends)

Big Jim Action figure Winnetou (by Mattel)
Big Jim Action figure Winnetou (by Mattel) wearing handknitted boxer shorts

Instructions

Cast on 30 stitches.

Row 1: k1, p1 to end of row.

Row 2 - 5: Divide stitches evenly on 3 double-pointed needles and join in the round, placing a stitch marker at the beginning of the round. Continue in k1, p1 ribbing for another 4 rounds.

Waist Increases: 

Row 6: SM (slip marker), k1, PM (place marker), kfb, k11, kfb, pm, k1, pm, kfb, k to last stitch, kfb (34 stitches)

Row 7 - 11: Repeat above increase row five times in stockinette stitch, knitting in the front and back of each stitch directly before and after each marker until the stitch count totals 54 stitches.


Dividing for the legs

Removing markers, at the beginning of the next round place the first 27 stitches onto waste yarn. 

Join the remainder of the stitches in the round, placing a marker at the beginning of the new round.

Row 12: sm, kfb, knit to last stitch, kfb (29 stitches)

Continue knitting in stockinette stitch for 11 rounds and bind-off or continue knitting until piece has reached the desired length.

Proceed to knit the second leg, dividing stitches held on scrap yarn evenly on three double-pointed needles. Using the m1 increase method, pick up 1 stitch at the beginning and at the end of the round to ensure a closed up seam. Mark the beginning of the round and start knitting the second leg, following the instructions above. 

Weave in all ends, block and enjoy!

For my other doll knitting patterns, please visit this link.


Big Jim Action figure Winnetou (by Mattel) wearing handknitted boxer shorts


Big Jim Action figure Winnetou (by Mattel) wearing handknitted boxer shorts

Big Jim Action figure Winnetou (by Mattel) and his haul of hand-knitted boxer shorts

Should you require pattern support, please feel free to contact me via Ravelry, Twitter, by e-mail or leave a comment below.

This pattern is for personal use only and may not be reproduced for commercial purposes without permission. Neither may you sell any items made from the directions in this pattern.


© 2019 Clarice Asquith. All rights reserved. http://makedoandmendnovice.blogspot.com