Taking stock of my knitting projects this year, it appears that I have been knitting rather a lot of socks over the past 11 months - 5 pairs in total so far, to be precise. Following my very first sock knitting project back in 2015, I turned my attention to other types of knitting projects and focussed mainly on lace knitting, but this year I fancied a change and focussing on sock knitting and sock knitting techniques felt just right.
 |
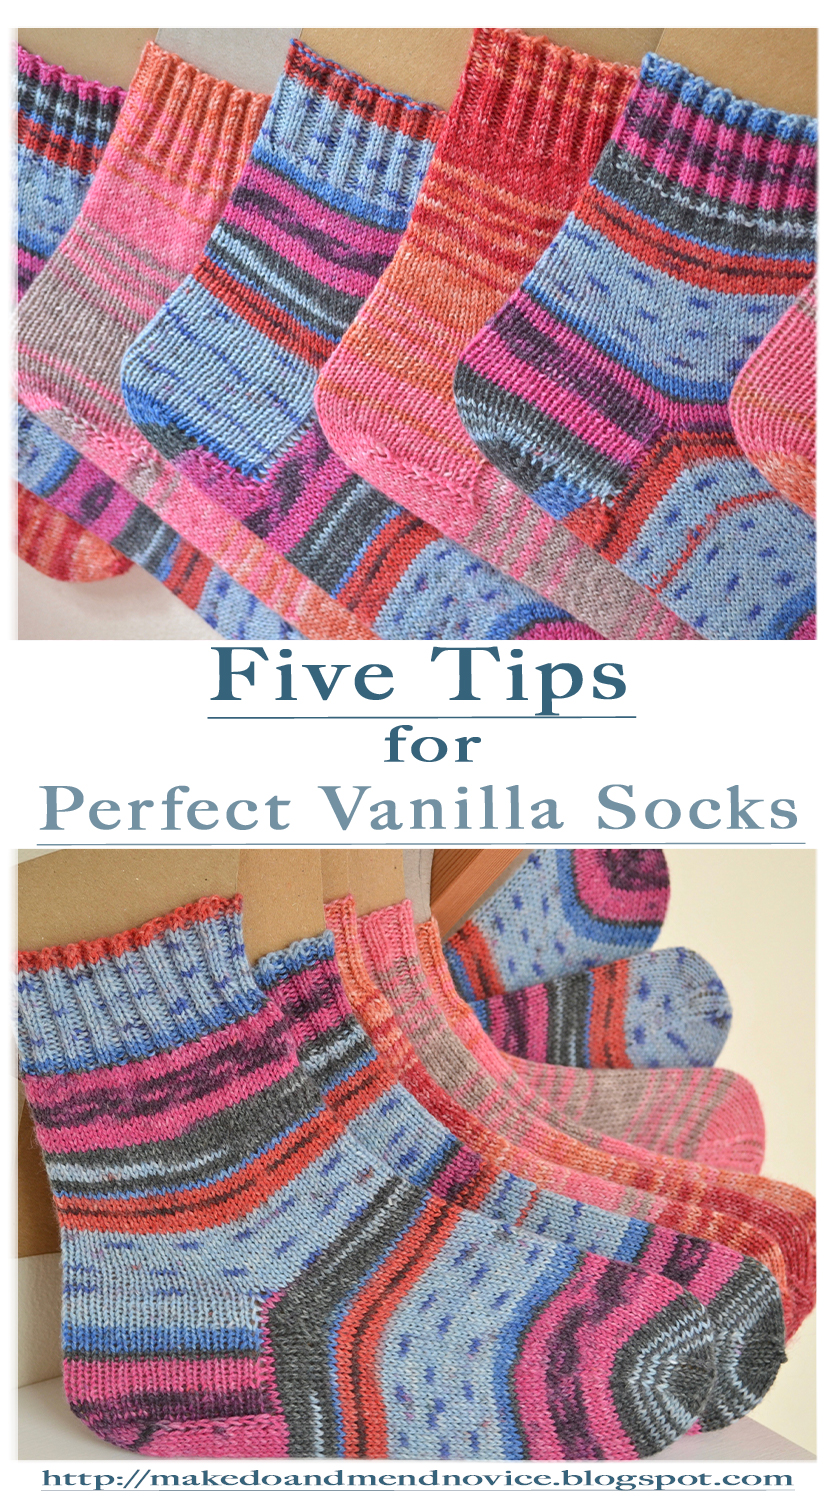
| Finished Socks on DIY Sock Blockers |
Based on my recent excursion into the world of sock knitting, what follows are a few recommendations for novice sock knitters, including five tips to achieve perfectly fitting, vanilla top-down socks.
As I have made use of Kate Atherley's Sock 101 for my own sock knitting projects, this post will refer to her instructions and, if you are new to knitting top-down socks, I highly recommend you take a look.
 |
| Finished Socks on DIY Sock Blockers - Yarn: Opal Sock Yarn (blue sock) and Stylecraft Head over Heels |
|
Why knit socks?
Whilst sock knitting might appear intimidating to a beginner knitter, for those knitters familiar with the basics of knitting as well as knitting in the round and with some experience in the use of double double-pointed needles, a sock knitting project could actually be a good skill fit.
Though the sock knitting terminology might be off-putting at first, especially if you are unsure as to what exactly a gusset is, where the in-step is located and what you are expected to do when it comes to turning a heel, there are many reasons why sock knitting could be the ideal next - level project.
 |
| Sock Knitting in progress - the cuff, yarn: Stylecraft Head over Heels |
Here are my top five reasons for knitting socks:
- Being generally quite small, socks make for highly portable projects any time of the year.
- If knitting a plain (vanilla) sock, for large stretches of the project, you are actually just knitting in the round to create a tubular piece of knitted fabric in plain stockinette stitch - absolutely no purling will be required for these sections of the project.
- In order to have a wearable pair of socks, you will obviously have to commit to knitting two socks. But you will be able to check on the these whilst knitting, increasing the likelihood that the sock will both fit and eventually be worn.
- By simply adjusting stitch and row count, sock knitting patterns can be adapted easily to meet your individual sizing requirements or to incorporate interesting stitch motifs.
- When looking at the anatomy of a sock and comparing it to a glove, for instance, it becomes apparent that the construction of a sock is actually less involved, let alone the level of commitment required when compared to a jumper knitting project.
 |
| Stacked Socks on Blockers |
Where to start your sock knitting adventure?
When it comes to knitting up your first sock, selecting a well written, straightforward sock knitting pattern is the key to success. There are many good beginner sock knitting patterns out there, but I found Kate Atherley Sock Knitting 101 especially helpful when getting to grips with the foundations of top-down sock knitting.
Sock Knitting 101 is both an instruction manual for knitting top-down socks, explaining the sock knitting terminology, the anatomy and the construction process of a top-down sock; and it provides the novice sock knitter with a step-by-step guide and calculation for working an initial test sock.
What's more, if you move on from a test sock, you can use Sock 101 for creating your very own made-to-measure socks and I would always recommend it as a go-to guide and starting point for simple top-down socks.
Five Tips for Perfect Top-Down Vanilla Socks
If you decide to follow sock 101 or any other top-down sock knitting pattern, here are my top five tips for creating the perfect vanilla sock:
 |
| Sock Knitting in progress - Cuff in 2x2 Ribbing |
The Cuff
To achieve a snug fit, the cuff is usually worked in ribbing and on slightly smaller needles. As you will be working a top-down sock on double-pointed needles or small circular needles, those stitches need to be cast-on securely, i.e. quite tight, getting the project off to a good start. I found that despite choosing the correct stitch count to achieve the required circumference, the cast-on edge felt too tight. In order to adjust this, I recommend casting onto two needles held together. This will ensure that the cast-on edge provides flexibility, whilst the cuff is still snug.
 |
| Sock Knitting in progress - Cuff in 2x2 Ribbing |
Count your Rows
This sounds like a no-brainer, but to achieve two identical socks, it's imperative to be strict with yourself and count those rows religiously. It's tempting to simply knit away in plain stockinette and to tell yourself that you will count those rows afterwards. Don't do it. Even if the row count of your completed socks differs by only one or two rows, you will notice this difference afterwards.
Wrapping Stitches (when Turning the Heel)
When working the short rows for the heel decreases, some top-down sock knitting patterns, including the instructions in Sock 101, do not call for wrapping the stitches before continuing on the short rows. I have worked the heel short rows for some of my socks without wrapping and for some of them I incorporated the wrap. I found that wrapping the stitches after working the decreases and before continuing with the short row actually seems to result in a neater, sturdier heel and I would therefore opt to wrap the stitches.
 |
| Stacked Socks on Blockers |
Working the Toe Decreases
In some top-down patterns, including Atherley's Sock 101, the decrease rounds are worked on every other row until there are 6 to 8 stitches remaining. Decreasing stitches on every other row will work just fine, but I prefer working my decreases staggered, resulting in a more gradual reduction of stitches and a rounder, more even shape to the toe section.
I recommend working the toe decreases as follows:
Work one decrease round, followed by three even rounds. (Once)
Work one decrease round, followed by two even rounds. (Twice)
Work one decrease round, followed by one even round. (Three times)
Work a decrease round on every following round until eight to six stitches remain.
Finishing and Binding-Off your Top-Down Sock
There are many options for finishing a sock: kitchener stitching, the three needle bind -off or by simply pulling the yarn through the last remaining (usually 6 to 8) stitches. In Sock 101, it appears that Atherley is in favour of the kitchener bind-off.
I followed this advice and tried both a three-needle bind-off as well as joining up with a kitchener bind-off. I found that both kitchen stitching and a three-needle bind-off resulted in too straight a line. Overall, I have to say that simply pulling the yarn through the last remaining stitches, provided not only the easiest way of finishing the sock but also looked aesthetically the most pleasing, keeping the shape of the bind-off in line with the round shape of the toe section. If the yarn end is thoroughly secured on the inside of the sock, this method will be just as secure as kitchener stitch.
I hope the above points have helped and inspired your sock knitting.
For my review of Stylecraft's Head over Heels sock yarn (the pink yarn in the images), please visit this link.
Happy crafting.


No comments:
Post a Comment