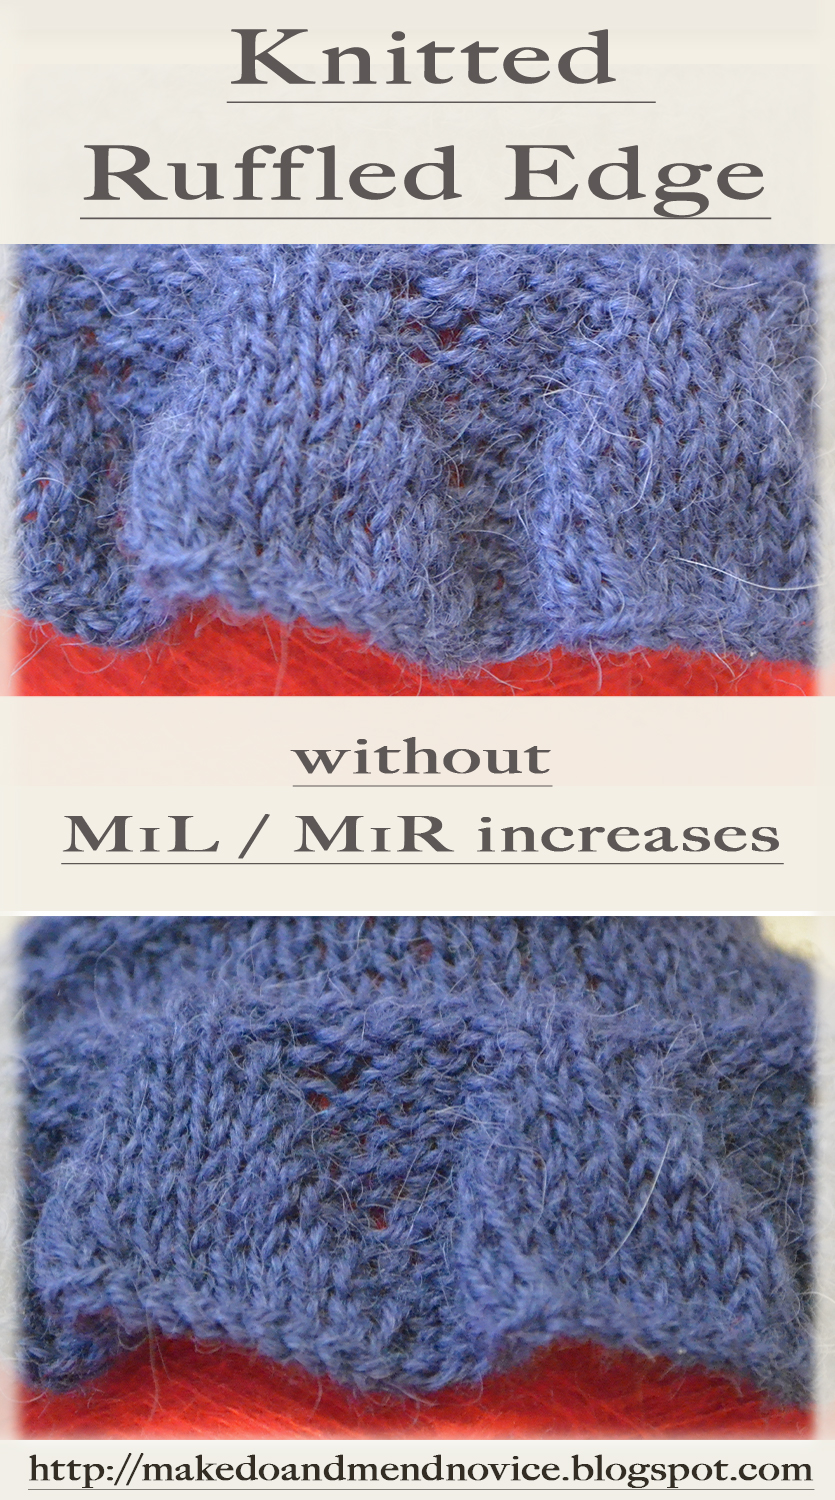
The Simple Knitted Ruffled Edge (worked at the end of the knitting)
When I was knitting my Virga Shawl, I wanted to incorporate a ruffled edge detail, but didn't feel like working m1l / m1r increases, considering the overall stitch count at this stage of the project (over 500 stitches). And so the search began for a simpler way of working the ruffled edging without m1l / m1r increases.
 |
| Knitted Ruffled Edging - Virga Shawl Detail |
The Simple Ruffled Edge - With M1L / M1R Increases
The most common, simple ruffled edging is achieved by working m1l (make one left) and m1r (make one right) increases into the knitting. In the instructions below for a ruffled edge worked at the end of the knitting on a multiple of 6 plus 5 stitches, the m1l / m1r increases are placed just before and after the knit stitches on the right side rows. This results in an increase of purl stitches on the following row (wrong side row), whilst the amount of knit stitches on the wrong side rows remains constant throughout. In turn, as the stockinette part of the fabric grows, this creates the ruffle on the right side of the knitting.
The stitch pattern for a ruffled edging with M1L / M1R increases is as follows:
Row 1 (RS): P5, *k1, p5, rep from * end.
Row 2 (WS): K5, *p1, k5, rep from * end.
Row 3 (RS): P5, *M1R, k1, M1L, p5, rep from * end.
Row 4 (WS): K5, *p3, k5, rep from * end.
Row 5 (RS): P5, *M1R, k3, M1L, p5, rep from * end.
Row 6 (WS): K5, *p5, k5, rep from * end.
The m1l and m1r increases between the sections of purl and knit stitches are continued as shown above until the ruffled edging has reached the desired length.
Whilst the above technique produces a neat looking ruffled edge, it is time consuming as a result of the m1l / m1r increases.
The Simple Ruffled Edge - Without M1L / M1R Increases
 |
The Simple Ruffled Edge - Without M1L / M1R Increases |
In my efforts to avoid m1l / M1r, I decided to try knitting the ruffled edge with kfb (knit one into front and back) increases initially. Yet, when I knitted my edge sample with kfb increases, I didn't feel that the symmetry of the edging looked quite right, as the kfb increases created large holes in the fabric. All in all, I felt that the kfb increases didn't look neat. To fix this and improve the appearance of the ruffled edge without working m1l and m1r increases, I proceeded to work the increases slightly differently and tried something new.
Instead of knitting in the front and back of the stitch that was to be increased, I decided to work p/ktbl and k/ptbl increases before and after the knit stitches on the right side row. (I am not sure whether the abbreviations k/ptbl and p/ktbl are correct, but as I was unable to find them referenced anywhere, I am for now just going along with these abbreviations to describe this type of increase.)
The p/ktbl and k/ptbl increases are achieved by purling (as normal) and then knitting through the back loop of the same stitch (p/ktbl) and by knitting (as normal) and then purling through the back loop of the next increase stitch (k/ptbl), thus maintaining the symmetry of knit and purl stitches.
Increasing in this way tightens the holes, that would appear if a simple kfb increase was used, and is also much faster than working the m1l / m1r increases, which are traditionally called for. By working the increases into the purl stitch immediately preceding and following the knit stitches I maintained the increases on the right side rows just before and after the knit stitches.
The P/ KTBL K/PTBL Ruffled Edge
The stitch pattern for a ruffled edging with a multiple of 6 plus 5 stitches worked with P/ KTBL and K/PTBL increases looks like this:
Row 1 (RS): P5, *k1, p5, rep from * end.
Row 2 (WS): K5, *p1, k5, rep from * end.
Row 3: P4, *(p/ktbl) into same stitch, k1, (k/ptbl) into same stitch, p3, rep from * to last stitch, p1.
Row 4: K5, *p3, k5, rep from * end.
Row 5: P4, *(p/ktbl) into same stitch, k3, (k/ptbl) into same stitch, p3, rep from * to last stitch, p1.
Row 6: K5, *p5, k5, rep from * end.
Row 7: P4, *(p/ktbl) into same stitch, k5, (k/ptbl) into same stitch, p3, rep from * to last stitch, p1.
Row 8: K5, *p7, k5, rep from * end.
Row 9: P4, *(p/ktbl) into same stitch, k7, (k/ptbl) into same stitch, p3, rep from * to last stitch, p1.
Row 10: K5, *p9, k5, rep from * end.
Row 11: P4, *(p/ktbl) into same stitch, k9, (k/ptbl) into same stitch, p3, rep from * to last stitch, p1.
Row 12: K5, *p11, k5, rep from * end.
Continue to increase as above until the edging has reached the desired length and proceed to bind off in pattern.
 |
| Simple Knitted Ruffled Edge |
For more knit stitch patterns, please follow this link to my knit stitch library.


